· engineering
Run a Frontend and API Together From One Tunnel File
Stop juggling multiple terminals. Learn how to configure instawormhole.toml to launch up to 10 local frontend and backend tunnels simultaneously from one CLI command.
By InstaWormhole team, Engineering
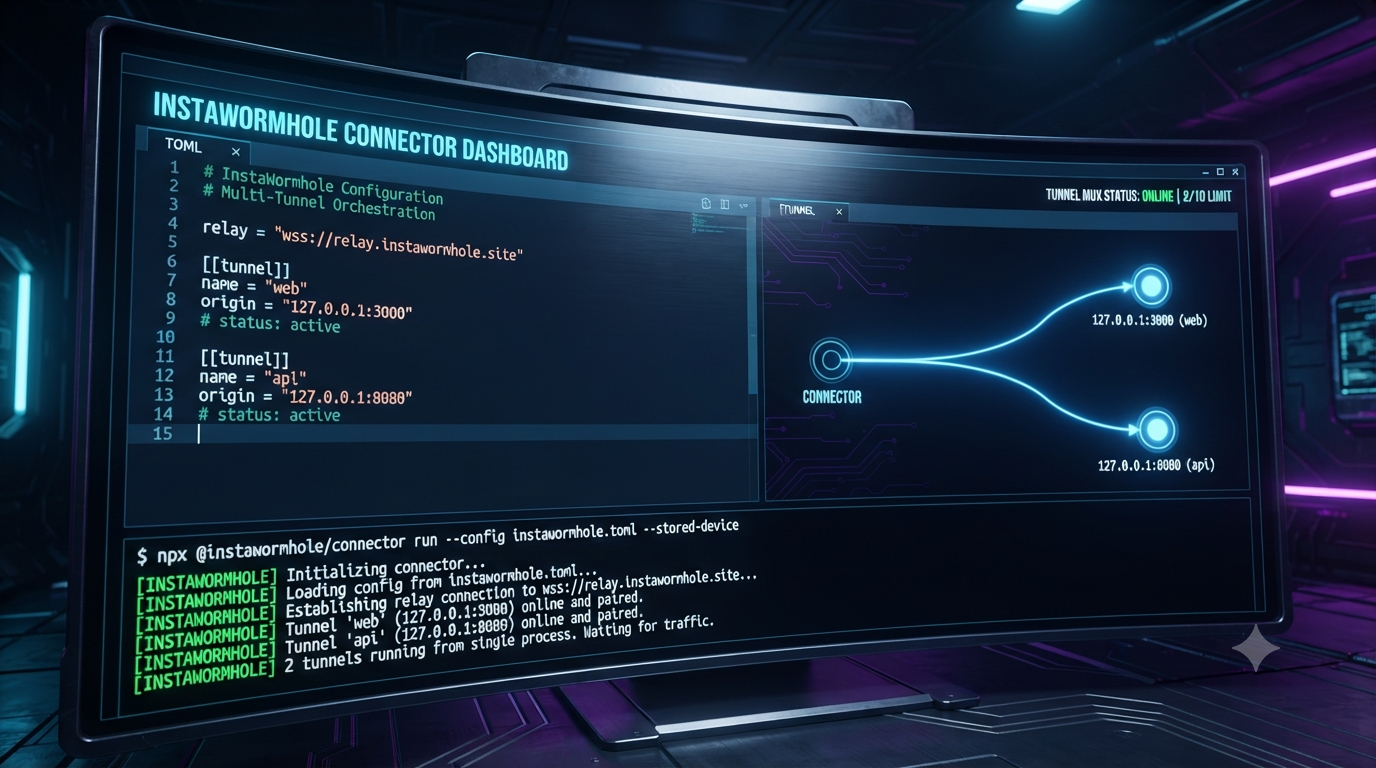
Full-stack development rarely happens on a single port. Even a straightforward web application typically requires a frontend development server running on one local port—such as 127.0.0.1:3000 for React, Next.js, or Vite—and a backend API server running on another, such as 127.0.0.1:8080 for Node.js, Go, Python, or Rust. When you need to expose both local services over public HTTPS addresses simultaneously to test webhooks, preview mobile layouts, share work in progress with teammates, or verify cross-origin authentication flows, managing separate tunnel commands across multiple terminal tabs quickly becomes tedious.
InstaWormhole addresses this workflow bottleneck with declarative configuration via instawormhole.toml. Instead of running separate commands for every port on your machine, you can define up to 10 tunnels inside a single file and start every tunnel in the file from one connector process using npx @instawormhole/connector run --config instawormhole.toml --stored-device (with Node.js 20 or later).
This guide walks through configuring instawormhole.toml to expose a local frontend and backend API side by side, connecting to durable tunnels from the dashboard, and avoiding the strict formatting and validation checks that trigger config_invalid.
Why Use a Single Configuration File for Full-Stack Tunnels?
Running separate tunnel commands in multiple terminal windows introduces operational friction during active development:
- Fragmented terminal management: Keeping track of which terminal tab corresponds to your UI versus your API slows down debugging when you need to restart local servers or inspect connection output.
- Inconsistent lifecycle state: If one tunnel process is stopped or closed accidentally while another remains running, your frontend may attempt to reach an inactive public API endpoint.
- Repetitive command-line flags: Passing relay URLs, loopback origins, device credentials, and tunnel identifiers repeatedly via CLI arguments becomes error-prone as soon as you expose more than one service.
By centralizing your tunnel definitions in instawormhole.toml, your local routing topology lives alongside your project or configuration directory. According to the InstaWormhole documentation on running several tunnels from one file, a single command reads the file, starts every tunnel defined in it, and prints each public address while opening outbound connections through the relay.
"Start several tunnels, for example a web app and an API, with one command." — InstaWormhole Docs: Run several tunnels from one file
Anatomy of instawormhole.toml
An instawormhole.toml configuration file consists of a top-level relay endpoint declaration followed by one or more [[tunnel]] sections (up to 10 tunnels per file). Each [[tunnel]] section maps a local loopback origin to a public tunnel address.
Below is the standard configuration pattern for pairing a frontend application on port 3000 with an API server on port 8080:
relay = "wss://relay.instawormhole.site"

[[tunnel]]
name = "web"
origin = "127.0.0.1:3000"

[[tunnel]]
name = "api"
origin = "127.0.0.1:8080"
Top-Level Configuration Keys
At the root of instawormhole.toml, you specify the relay endpoint that the connector uses:
relay: Specifies the InstaWormhole relay endpoint using plain double-quoted strings, set to"wss://relay.instawormhole.site".
Tunnel Entry Keys ([[tunnel]])
Each [[tunnel]] section defines an individual tunnel started by the connector process, with a maximum of 10 tunnels in one file:
name: A label for the tunnel entry (for example,"web"or"api").origin: The local loopback address and port where your service is listening (for example,"127.0.0.1:3000"or"127.0.0.1:8080").tunnel(optional): The ID of a durable tunnel from the InstaWormhole dashboard. Including this key connects that entry to an existing durable tunnel rather than opening a temporary address.
| Key | Level | Required | Description | Example |
|---|---|---|---|---|
relay | Root | Yes | InstaWormhole relay endpoint string | "wss://relay.instawormhole.site" |
name | [[tunnel]] | Yes | Label for the tunnel entry | "web" |
origin | [[tunnel]] | Yes | Local loopback address and port | "127.0.0.1:3000" |
tunnel | [[tunnel]] | No | Durable tunnel ID from the dashboard | "0199aa00-0000-7000-8000-00000000000c" |
Step-by-Step: Running Your Frontend and API Together
Follow these steps to set up and run both your frontend and backend services through a single instawormhole.toml file.
1. Start Your Local Frontend and Backend Servers
Before running the connector, start both local applications and confirm they are listening on loopback addresses:
- Start your frontend server on a loopback address such as
127.0.0.1:3000orlocalhost:3000. - Start your backend API server on a loopback address such as
127.0.0.1:8080.
Checking both local endpoints first ensures that once the connector prints each public HTTPS address, incoming traffic reaches active local servers rather than refused connections. Note also that framework dev servers such as Vite and Next.js may require configuration to accept your tunnel's address when accessed over HTTPS with hot reload.
2. Create Your instawormhole.toml File
Create a file named instawormhole.toml in the folder where you will run the connector:
relay = "wss://relay.instawormhole.site"

[[tunnel]]
name = "web"
origin = "127.0.0.1:3000"

[[tunnel]]
name = "api"
origin = "127.0.0.1:8080"
If you work in a shared repository and include durable tunnel IDs or personal configuration details in instawormhole.toml, add instawormhole.toml to .gitignore or keep a sanitized example file in version control.
3. Sign In Your Computer (--stored-device)
As documented in Expose localhost:3000 with npx: Run Options and Run several tunnels from one file, --config requires --stored-device so the connector uses the sign-in saved for your device. Follow the device sign-in steps in the InstaWormhole documentation if this computer has not yet been signed in. On Linux, --store file can also be added to commands to keep credentials in a private file instead of the operating system store.
4. Launch All Tunnels With One Command
Run the connector from the directory containing your configuration file:
npx @instawormhole/connector run --config instawormhole.toml --stored-deviceThe connector starts every tunnel defined in instawormhole.toml and prints each public address. HTTP, WebSockets, and streaming responses pass through the connector, allowing modern frontend dev servers and live connections to work over the assigned HTTPS addresses.
5. Point Your Frontend to the Public API Tunnel URL
Once the connector prints the public addresses for your web and api tunnels, update your frontend environment variables (such as NEXT_PUBLIC_API_URL or VITE_API_BASE_URL) so browser requests from the public frontend address target the public api tunnel address rather than a local-only port unreachable from external devices or third-party services.
When testing on a phone, sharing work in progress, or receiving webhooks from external providers, both your frontend UI and backend API remain reachable through their respective public HTTPS URLs for as long as the connector runs.
Connecting Durable Tunnels From the Dashboard
When you omit the tunnel key in a [[tunnel]] block, the connector opens a temporary address for that entry. Temporary addresses are convenient for quick experiments, whereas durable tunnels from the dashboard provide distinct advantages documented in Expose localhost:3000 with npx: Run Options and InstaWormhole:
- Stable addresses: A durable tunnel keeps its address across sessions and automatic reconnections.
- Access protection: Durable tunnels can be protected with access controls such as passwords, access tokens, email codes, or IP lists.
- Request inspection: Durable tunnels show their requests in the request inspector.
To connect a [[tunnel]] entry in instawormhole.toml to a durable tunnel:
- Locate or create the durable tunnel in the InstaWormhole dashboard and copy its tunnel ID.
- Add the optional
tunnelkey with that ID to the matching[[tunnel]]block ininstawormhole.toml.
relay = "wss://relay.instawormhole.site"

[[tunnel]]
name = "web"
origin = "127.0.0.1:3000"
tunnel = "0199aa00-0000-7000-8000-000000000001"

[[tunnel]]
name = "api"
origin = "127.0.0.1:8080"
tunnel = "0199aa00-0000-7000-8000-000000000002"
When you run npx @instawormhole/connector run --config instawormhole.toml --stored-device, each entry connects to its specified durable tunnel while forwarding traffic to its local loopback origin. Keep in mind account and plan allowances as well: for example, the Free plan supports 3 tunnels online at once, 5 GB transfer a month, 120 requests a minute per tunnel, sessions up to 24 hours, and 1 reserved address, while paid plans start at $4.99 a month.
Scaling Up: Running Up to 10 Services Together
A single instawormhole.toml file supports up to 10 tunnels from one connector process, making it practical to expose multiple local services—such as a web app, an admin interface, a core API, and background or worker endpoints—from one command:
relay = "wss://relay.instawormhole.site"

[[tunnel]]
name = "web"
origin = "127.0.0.1:3000"

[[tunnel]]
name = "admin"
origin = "127.0.0.1:3001"

[[tunnel]]
name = "api"
origin = "127.0.0.1:8080"

[[tunnel]]
name = "auth-service"
origin = "127.0.0.1:8081"

[[tunnel]]
name = "webhook-worker"
origin = "127.0.0.1:9000"
Pressing Ctrl+C stops the connector so the public addresses stop answering. If the connection drops—for example, when your computer sleeps—the connector reconnects on its own, and durable tunnels keep their addresses.
Validation Rules and config_invalid Watch-Outs
According to Run several tunnels from one file, if something is wrong with the configuration file, the connector stops with the error config_invalid. The file format is intentionally strict to protect you from a typo that could expose something unexpected.
1. Loopback-Only Origins
Every origin in instawormhole.toml must be a loopback address (such as 127.0.0.1:3000, localhost:5173, or [::1]:3000). A configuration file or --origin value that specifies a non-loopback address is refused.
- Valid origin:
origin = "127.0.0.1:3000" - Invalid origin:
origin = "192.168.1.50:3000"(non-loopback address is refused) - Invalid origin:
origin = "example.com:80"(non-loopback host is refused)
2. Up to 10 Tunnels Per File
A single configuration file supports up to 10 tunnels. Defining more than 10 tunnels in one file triggers config_invalid. If you need to manage additional tunnels across separate sets of services, split them into multiple configuration files and run separate connector commands.
3. Strict Allowed Keys, Plain Double-Quoted Strings, and Comments
The documentation specifies that only the documented keys are allowed, using plain double-quoted strings and # comments. Unknown keys, malformed syntax, or invalid values cause the connector to stop with config_invalid, and the message names the key or value to fix. Also note from Expose localhost:3000 with npx: Run Options that the connector refuses an option given twice rather than letting the last occurrence win.
| Configuration Mistake | Why It Fails | How to Fix It |
|---|---|---|
Non-loopback origin address | Every origin must be a loopback address | Use a loopback address such as 127.0.0.1:3000 or localhost:3000 |
| More than 10 tunnels in one file | One file opens up to 10 tunnels | Keep total tunnels in instawormhole.toml to 10 or fewer, or split into another file |
| Unallowed keys or syntax errors | File format allows only documented keys, plain double-quoted strings, and # comments | Fix the key or value named in the config_invalid message |
| Duplicate CLI options | Connector refuses an option given twice | Pass each flag once per command invocation |
Troubleshooting Checklist
When a multi-tunnel setup needs debugging, work through these checks using the InstaWormhole documentation:
- Connector exits with
config_invalid: Inspect the error message for the key or value named, confirm everyoriginis a loopback address, verify you have at most 10 tunnels in the file, and check that you only use allowed keys, plain double-quoted strings, and#comments. - App does not respond or times out: Verify your local frontend and API servers are running on their configured loopback ports, and check
--origin-timeoutoptions if your app needs longer response or idle windows (from 1 to 3600 seconds; defaults are 10 minutes to wait for a response to start and 2 minutes with no data). - Cross-origin requests between frontend and API tunnels: Because your frontend tunnel and API tunnel have separate public HTTPS addresses, ensure your API server allows requests from your public frontend tunnel origin and that your frontend framework is configured for tunnel usage.
- Sign-in or diagnostic issues: Confirm the computer is signed in when using
--stored-device, inspect traffic in the request inspector on durable tunnels, and use Tunnel Doctor or the diagnostic documentation in InstaWormhole Docs to check DNS, TLS, connector, protection, and app layers.
Summary of Commands and Configuration
Keep this minimal configuration and command handy when setting up a frontend and API together:
relay = "wss://relay.instawormhole.site"

[[tunnel]]
name = "web"
origin = "127.0.0.1:3000"

[[tunnel]]
name = "api"
origin = "127.0.0.1:8080"
Launch the configured tunnels with:
npx @instawormhole/connector run --config instawormhole.toml --stored-deviceUsing instawormhole.toml keeps your frontend and API tunnel definitions in one place, lets you start up to 10 tunnels from a single command, and supports both temporary and durable dashboard tunnels. For complete details on device sign-in, framework guides, access protection, and diagnostics, consult the InstaWormhole documentation.